
For those of you in a rush to see the image pop-ups solution, click on the link to my JSFiddle. If curious, please continue reading for an explanation to it all.
Making an image appear when hovering over text was an issue I encountered with my deck builder web app, Chrono Clash Decks. I wanted to hover over a card’s name and have that card image appear. I thought this would be a simple enough task, but after some fruitless google searching, I discovered that there wasn’t a simple solution for my problem.
I didn’t find my desired results. I found solutions that used HTML and CSS that loaded images on start-up, but were hidden off-screen until the user hovered over the text. Once hovered, the image would be shifted over into the user’s view. While clever, I felt this solution was a waste of resources and not suitable for my dynamic requirements. I needed a way to have a dynamic list of elements that had image pop-ups. Also, loading all images simultaneously would slow down my page. This was important to avoid for my deck building site that already displays 12 card images, not including the potential 20+ pop-up images.
After searching for a hair-ripping-out-of-head amount of time, I realized that I would just have to come up with a solution myself. A daunting task, as I never practiced much javascript. I eventually figured it out and I’ve isolated my example to show others how a cool feature such as this is pretty easy to implement.

I’m going to assume you have a rudimentary understanding of HTML, but I will explain some of the more complicated portions, specifically how HTML ties in with javascript. Below are the entire index.html and imagePopup.js files. Details to follow.
<button
id="imageSmall"
onmouseover="showImage('imageSmall','https://picsum.photos/100')"
onmouseout="hideImage('imageSmall')"
onclick="tellToHover()"
      >
Let’s look at this tag from index.html. The id attribute is what we’re going to use to identify this specific tag. The next three attributes are events: onmouseover, onmouseout, and onclick. When those events occur (onmouseover is to hover, onmouseout is when you stop hovering, and onclick is when you click) the function or action assigned will be executed.
For onmouseover we are calling the showImage function with two parameters, ‘imageSmall’ the id name and a link to an image. To properly understand what exactly is going on with showImage, let’s look at the function itself.
function showImage(elemId, imgSrc) {
  console.log("Mouse is over text");
  console.log("\tElemId:" + elemId + " Image Source:" + imgSrc);
  const elem = document.getElementById(elemId);
  const popImage = new Image();
  popImage.src = imgSrc;
  popImage.style.position = "absolute";
  popImage.style.zIndex = "1";
  elem.appendChild(popImage);
}
Here’s the function, showImage, with two parameters, the element id and the image source. The console log functions are there to help with troubleshooting and assures you are calling the right element when you hover. The more interesting bits that create the image start with const elem.
document.getElementById(elemId) grabs the element that has the matching id attribute. In this context, the function would grab the element that has the id=”imageSmall” and store that element in the const elem. A new Image object called popImage is then created. We then assign the image source, position, and z-index. Image source is the link to the image, position being absolute allows the image to be placed wherever you need it, and the z-index sets the image “on top” of the web page. For z-index, think of it as the 3rd dimension coming towards you in an xyz plane. The higher the number, the closer it is to you.
The final line uses the elem object and appends the popImage as a child to elem. This nests the image object you’ve created (or image tag <img> if that helps you think of it) inside the elem element.
Below, is a screenshot of the Google Chrome developer tools Elements tab that shows the source HTML after hovering over the button.

As you can see, the popupImage Image object we’ve created was turned into an <img> tag nested inside our <button> tag. With this function, our image now appears on hover! There’s just one major issue, it never goes away if we don’t define the hideImage function.

Let’s go over hideImage.
function hideImage(elemId) {
  console.log("Mouse is off text");
  console.log("\tElemId:" + elemId);
  const elem = document.getElementById(elemId);
  while (elem.childElementCount > 0) {
    elem.removeChild(elem.lastChild);
  }
}
This function is a lot simpler than showImage. Bypassing the two troubleshooting console logs, there’s only 3 lines of code to go over. We are once again grabbing the element with elemId as it’s id attribute. Then, we are going through a while loop, where as long as there are any child elements, we are going to remove the child element. This will remove the image we added with the showImage function.
Only one image appears on hover.
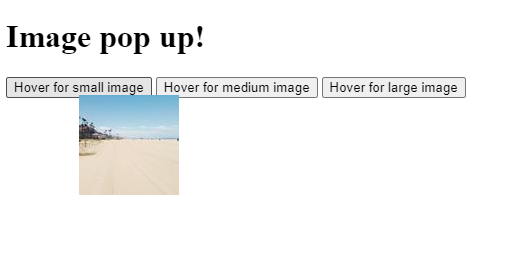
Image disappears when you are no longer hovering.

That’s all there is to it! I was pretty happy with this solution. It only loads the image when necessary, it deletes it when you’re done, and it’s clean. There’s no unnecessary css, or static css that’s tied to only a few specific elements.
Before we close out, I do want to show a simplified version of what I used on my deck builder and how you can use these functions dynamically.
@foreach(var card in deck) {
    <button
        id="@card.cardNumber"
        onmouseover="showCard('@card.cardNumber')"
        onmouseout="hideCard('@card.cardNumber')"
    > @card.cardName </button>
}
The code above is written in RAZOR, a combination of HTML with C#. It allows you to have variables throughout your HTML. In my code snippet, I have a foreach loop, grabbing each card in a deck and creating a button for each card. The id is dynamically set with the card number, and the showCard and hideCard function parameters are also set dynamically. Each card has a unique card number and therefore each element will have a unique id. These few lines of code allow me to have images pop up for whatever cards happen to be in the deck at that time, and that was exactly what I was looking for!
I hope you enjoyed learning how to incorporate image pop ups as well as integrating javascript with HTML. Remember, resources are great, but sometimes you just have to figure out a solution yourself. When you do, let the rest of us know!
